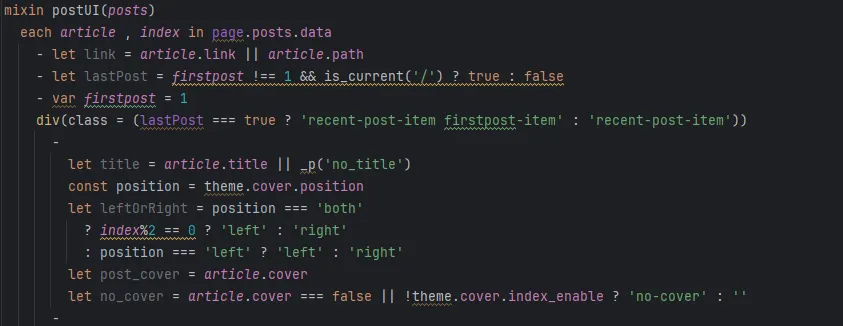
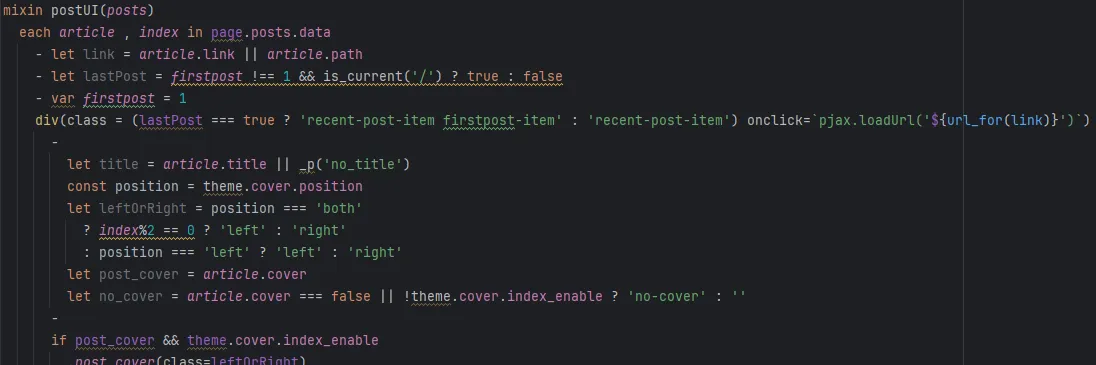
mixin postUI(posts)
  each article , index in page.posts.data
+    - let link = article.link || article.path
+    - let lastPost = firstpost !== 1 && is_current('/') ? true : false
+    - var firstpost = 1
+    div(class = (lastPost === true ? 'recent-post-item firstpost-item' : 'recent-post-item') onclick=`pjax.loadUrl('${url_for(link)}')`)
-    #recent-post-item
      -
-        let link = article.link || article.path
        let title = article.title || _p('no_title')
	...
1
2
3
4
5
6
7
8
9
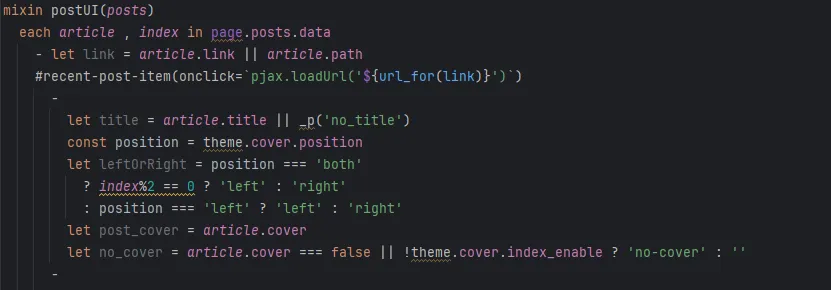
mixin postUI(posts)
  each article , index in page.posts.data
+    - let link = article.link || article.path
+    #recent-post-item(onclick=`pjax.loadUrl('${url_for(link)}')`)
-    #recent-post-item
      -
-        let link = article.link || article.path
        let title = article.title || _p('no_title')
	...

 微信
微信 支付宝
支付宝